An Unexpected Error Occurred. Please Try Again Later. Changing Gamertag
Windows has several born troubleshooters which can really assist with some of the most common issues you might be faced up against. The troubleshooter might non always solve the problem you were experiencing at the moment only information technology will display what went incorrect and you tin narrow down your search for the correct respond.
Windows x troubleshooters can be located in the Settings app nether the Update & Security section. For example, if you are experiencing issues with your Net connexion, you lot tin can try running the Internet Connections troubleshooter.
However, sometimes the troubleshooter simply won't showtime and it will display this error message: "An Unexpected Error Has Occurred. The Troubleshooting Wizard Tin't Continue." This tin exist quite annoying, especially if yous were trying to solve a problem that has been bugging you for a while. Follow the solutions beneath in order to find out how to solve this event.
Solution 1: If the Trouble Occurred After an Update
If the solution you were having occurred after you have performed an update or after Windows installed it on its own, you might be able to solve the issue simply by resetting your Windows Update components, as this worked for plenty of users who were struggling with the exact same problem:
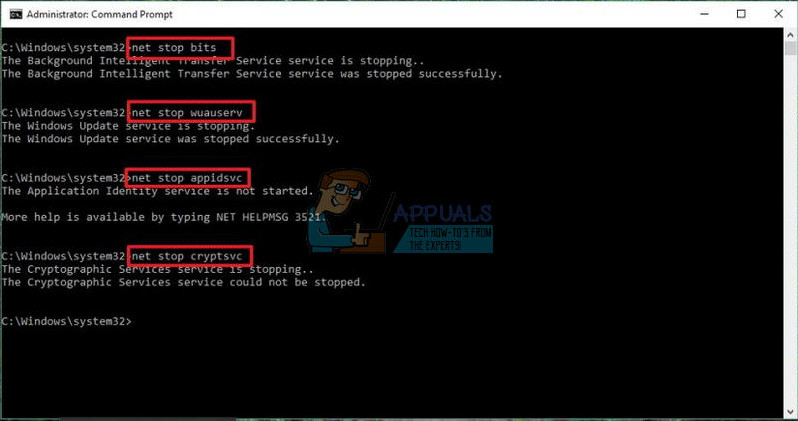
- Let's keep with the solution by killing the post-obit services which are the core services related to Windows Update: Background Intelligent Transfer, Windows Update, and Cryptographic Services. Disabling them before we outset is crucial if you lot want the residuum of the steps to perform smoothly.
- Search for "Control Prompt", right-click on it, and select the "Run as ambassador" option. Copy and paste the following commands and make sure you lot click Enter subsequently each one.
internet stop bits
net stop wuauserv
net end appidsvc
net stop cryptsvc
- After this, you will have to delete some files which should be deleted if you lot want to continue with resetting the update components. This is as well done via Command Prompt with administrative privileges.
Del "%ALLUSERSPROFILE%\Application Data\Microsoft\Network\Downloader\qmgr*.dat"
- The post-obit footstep can exist skipped if this is not last resort. This stride is considered to be the aggressive arroyo but it volition definitely reset your updating process from its very cadre. So nosotros tin recommend that you attempt this out. It has been suggested past a lot of people on online forums.
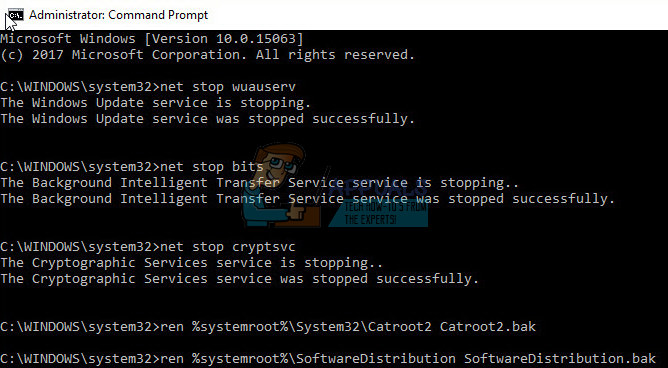
- Change the name of the SoftwareDistribution and catroot2 folders. In order to do this, at an administrative control prompt, copy and paste the following commands and click Enter after copying each one.
Ren %systemroot%\SoftwareDistribution SoftwareDistribution.bak
Ren %systemroot%\system32\catroot2 catroot2.bak
- The post-obit commands will help us reset the $.25 (Background Intelligence Transfer Service) and the wuauserv (Windows Update Service) to their default security descriptors. Make sure yous don't modify the commands beneath so it's for the all-time if you simply copy them.
exe sdset $.25 D:(A;;CCLCSWRPWPDTLOCRRC;;;SY)(A;;CCDCLCSWRPWPDTLOCRSDRCWDWO;;;BA)(A;;CCLCSWLOCRRC;;;AU)(A;;CCLCSWRPWPDTLOCRRC;;;PU)
exe sdset wuauserv D:(A;;CCLCSWRPWPDTLOCRRC;;;SY)(A;;CCDCLCSWRPWPDTLOCRSDRCWDWO;;;BA)(A;;CCLCSWLOCRRC;;;AU)(A;;CCLCSWRPWPDTLOCRRC;;;PU)
- Permit's navigate dorsum to the System32 binder in social club to proceed with the solution at manus.
cd /d %windir%\system32
- Since we have completely reset the $.25 service, nosotros volition need to reregister all of the files necessary for the service to run and operate smoothly. Yet, each of the files requires a new command in order to make information technology reregister itself and then the procedure may stop upward being lengthier than what you are used to. Copy the commands one by i and make sure you don't exit out whatever of them. Here is a listing of files which need to be reregistered along with the corresponding commands side by side to them.
- Some files may take been left behind subsequently these processes and so we are going to wait for them in this step. Open the Registry Editor past typing "regedit" in either the search bar or the Run dialog box. Navigate to the following cardinal in Registry Editor:
HKEY_LOCAL_MACHINE\COMPONENTS
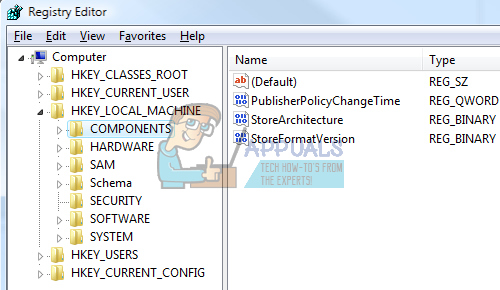
- Click on the Components key and cheque the right side of the window for the post-obit keys. Delete them all if yous locate whatsoever of them.
PendingXmlIdentifier
NextQueueEntryIndex
AdvancedInstallersNeedResolving
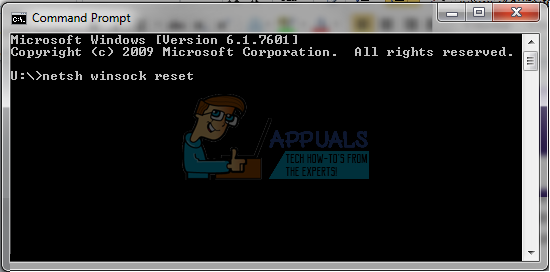
- The next thing we are going to practice is reset Winsock by copying and pasting the following command back into the administrative Command Prompt:
netsh winsock reset
- If you are running Windows 7, eight, viii.one, or ten, at a command prompt, re-create the following command, and tap the Enter fundamental:
netsh winhttp reset proxy
- If all of the steps above have gone through painlessly, you tin at present restart the services you killed in the very get-go footstep by using the commands below.
net start bits
net commencement wuauserv
cyberspace start appidsvc
net start cryptsvc
- Restart your figurer after following through with all of the steps which are listed.
Solution 2: Use the Chkdsk Utility
Some users claim that using the chkdsk utility helped fixed their issue almost immediately as these errors sometimes occur if the hd files have gone decadent or similar. The process is quite piece of cake but information technology may take a while for the tool to finish.
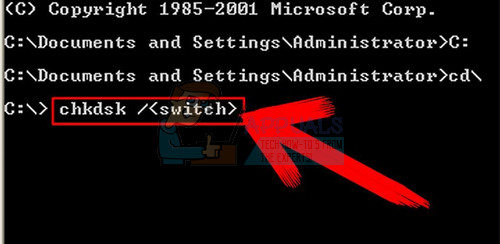
From Control Prompt
- Turn on your computer and log into Windows 10
- Printing the Windows central in order to open the Start Menu, select the search push or start typing immediately, and type in "cmd"

- Select "Command Prompt" which should be the first upshot, right-click on it, and select the Run equally administrator option.
- When Control Prompt launches, type in the following command:
- chkdsk C: /f /r /x
- The parameters for this control tin can be explained like this:
- /f option will try to fix whatever found errors
- /r selection volition search for bad sectors and recover any readable information
- /x option will forcefulness the drive y'all're about to check to be dismounted before the tool begins a scan
- If the C: bulldoze is in utilize, type Y to run a browse at your PC's next restart. If so, you should exit Command Prompt and restart the computer in order to make the scan run at the next startup.
From My Computer
- Turn on your computer and log into Windows ten.
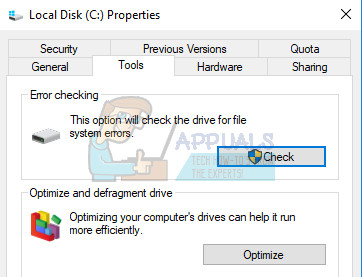
- Double-click on This PC (My Reckoner) in order to open it and right-click on the drive you lot would like to run a check on. Select the Backdrop selection and navigate to the Tools tab.
- Navigate to the Error checking department and select the Check option.
-
- If y'all come across the following bulletin, click Scan drive to brainstorm the browse:
- You don't need to browse this bulldoze
We haven't found whatsoever errors on this drive. You lot can even so scan the bulldoze for errors if you want. - You can keep using you computer during the scan. If whatsoever errors are found, you can decide if you want to fix them immediately. Depending on the results of this browse, the tool will class the results:
- If no errors occur on your drive, y'all'll run across this message:Your drive was successfully scanned
Windows successfully scanned the drive. No errors were establish.
- If errors occur on your drive, you'll see this message instead:
Restart your computer to repair file system. You can restart right away or schedule the error fixing on next restart.
Solution 3: Repair .NET Framework
This particular method may sound strange but it appears that a recent installation of Microsoft .Cyberspace Framework may exist a cause for this issue. If this is indeed the case, the problem should be able to solve itself in a couple of minutes.
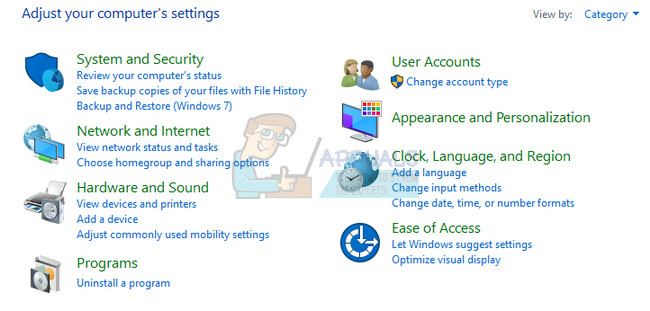
- Open your Windows Settings and navigate to the Apps section if you are using Windows 10.
- Open up Control Panel >> Programs and Features, if you lot are using an older Windows OS.
- Locate .NET Framework on the list of your installed programs listing and click on "Uninstall/Change".
- A window should open with several choices and you should be able to choose the Repair selection instead of remove.
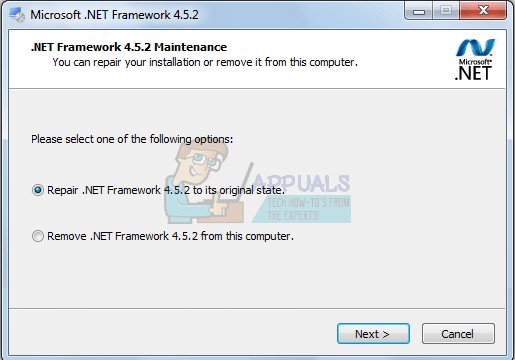
- The wizard will start to repair the installation on .NET Framework and you lot should now be able to run any troubleshooter without bug.
- If this doesn't work, you can e'er endeavour to only reinstall .NET Framework.
Solution four: Make Certain Some of the Essential Services are Running
Some of the services essential for the troubleshooting wizards are:
Diagnostic Service Host service
Diagnostic Organization Host service
Diagnostic Policy service
Without these services, the troubleshooter has no chance of starting then you should really check if these services are configured to run at all.
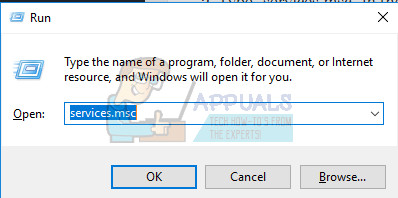
- If you lot are using a version of Windows older than Windows 10, the easiest way for you to admission the services running on your PC is clicking on the Start push button and navigating to the Run dialog box.
- Blazon "services.msc" in the dialog box and wait for the list of services to open up.
- If y'all are using Windows ten, y'all tin too access Services by using the Ctrl + Shift + Esc central combination in order to bring upward Task Director.
- Navigate to the Services tab in Task Director and click on Open up Services at the lesser of its windows, side by side to the gears icon.
After you have successfully open up Services, follow the instructions below.
- Locate the Diagnostic Service Host service by clicking on the Name column in order to sort the services in an alphabetical order.
- Right-click on the Diagnostic Service Host service and click on Properties.
- Navigate to the Startup blazon and prepare it to Automatic (Delayed Start).
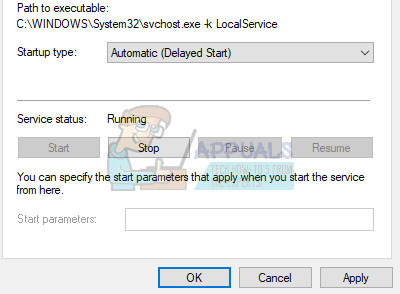
- If the service is non running, you will be able to click on Start just under the Service status.
The service should start now and you won't have any problems dealing with information technology in the future. However, you may receive the following fault bulletin when you click on Showtime:
"Windows could not start the Diagnostic Service Host service on Local Computer. Mistake 1079: The account specified for this service differs from the account specified for other services running in the same process."
If this occurs, follow the instructions below to prepare information technology.
- Follow the steps 1-four from the instructions below in club to open service's backdrop.
- Navigate to the Log On tab and click on the Browser… button.
- Under the "Enter the object proper noun to select" box, type in your calculator's name and click on Cheque Names and wait for the name to become authenticated.

- Click OK when you are done and type in the administrator password in the Password box when you are prompted with it.
- Click OK and close this window.
- Navigate back to Diagnostic Service Host service's properties and click Commencement.
- Close everything and check to run across if the service is even so running.
Annotation: If you lot nonetheless notice certain bug, open Services once again by following the instructions above and echo the same process for services named Remote Diagnostic System Host service
and Diagnostic Policy service. Make sure there are started and that their startup type is assail Automatic.
![]()
Source: https://appuals.com/fix-unexpected-error-occurred-troubleshooting-wizard-cant-continue/
Post a Comment for "An Unexpected Error Occurred. Please Try Again Later. Changing Gamertag"